Debugging CH32V103R with Visual Studio Code on Ubuntu #2

As I wrote in the previous post regarding debugging on the macOS environment, I figured out a way to avoid the Restart (Ctrl+Shift F5) and Disconnect (Shift+F5) operation issues I found in my past Visual Studio Code on Ubuntu post. So, I tested my finding on Ubuntu also.

At first, I edited the /etc/group file to add my Ubuntu account to the plugdev group (ncpin is my account name on Ubuntu).

/etc/group
[before]
plugdev:x:46:admin-user

[after]
plugdev:x:46:admin-user,ncpin

By doing this, I didn’t have to use the sudo command when I run the openocd command anymore. Since the Linux kernel sets the user group of the WCH-Link USB device to the plugdev group when the kernel detects the device according to the udev rule file /etc/udev/rules.d/50-wch.rules that I copied before, and if a user does not belong to the plugdev group, the user will need root privilege to access the WCH-Link USB device from a process like the openocd command.

I added the following line to the end of OpenOCD’s wch-riscv.cfg file.

$_TARGETNAME.0 configure -event gdb-detach { shutdown }

I replaced the contents of Visual Studio Code’s code-workspace JSON file as follows.

{
  "tasks": {
    "version": "2.0.0",
    "tasks": [
      {
        "label": "run_openocd",
        "type": "process",
        "isBackground": true,
        "command": "${workspaceRoot}/openocd",
        "args": ["-f", "${workspaceRoot}/wch-riscv.cfg"],
        "problemMatcher": [
          {
            "pattern": [
            {
              "regexp": ".",
              "file": 1,
              "location": 2,
              "message": 3
            }
            ],
            "background": {
            "activeOnStart": true,
            "beginsPattern": ".",
            "endsPattern": "."
            }
          }
          ]
      }
    ]
  },
  "folders": [
    {
      "path": "."
    }
  ],
  "launch": {
    "version": "0.2.0",
    "configurations": [
      {
        "name": "gdb-openocd",
        "type": "gdb",
        "request": "attach",
        "executable": "exiti0.elf",
        "remote": true,
        "target": ":3333",
        "cwd": "${workspaceRoot}",
        "gdbpath": "riscv32-unknown-elf-gdb",
        "preLaunchTask": "run_openocd",
        "autorun": [
          "set mem inaccessible-by-default off",
          "set architecture riscv:rv32",
          "set remotetimeout unlimited",
          "monitor reset halt",
          "load"
        ]
      }
    ]
  }
}

(Please note that this setting file assumes that both the openocd command and the wch-riscv.cfg file exists at the workspace root directory of the Visual Studio Code project)

With the above changes, I no longer needed to run the openocd command separately. When I started the debug operation, Visual Studio Code automatically ran the openocd command in the background, and the launched openocd command stopped when I chose the Restart (Ctrl+Shift F5) and Disconnect (Shift+F5) command. And I was able to start debugging again also, unlike before.
Debugging CH32V307V with Visual Studio Code on macOS

As the final testing of the CH32V series RISC-V MCU development environment on Mac, I tried whether I could debug a program running on WCH’s CH32V307RCT6 evaluation board (CH32V307V-EVT-R1) or not with Visual Studio Code in the same way as I did before on my Ubuntu 20.04 environment.

I tested Visual Studio Code using the same CH32V307 example as the previous post. This time, to generate debugging information, I added -g and -O0 to the GCC options in the Makefile (Here is the updated file) and rebuilt the example.

After installing Visual Studio Code to my MacBook Pro (intel, 13inch, 2020), I added the Native Debug extension by WebFreak.

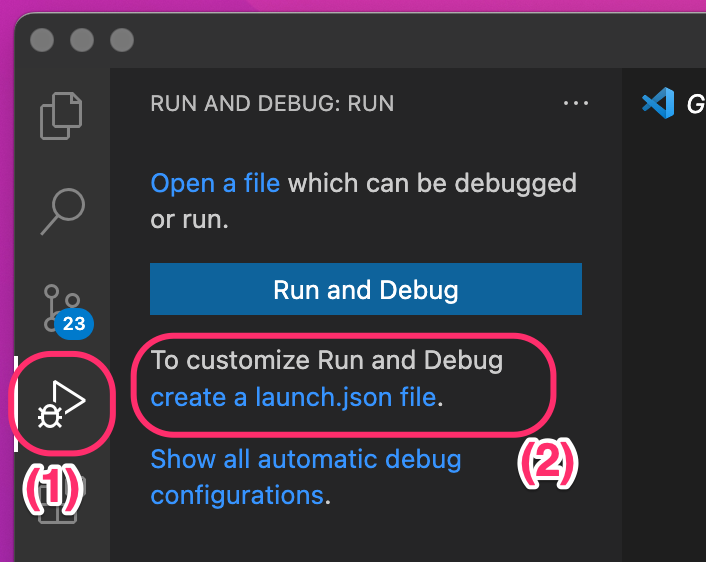
I saved a workspace of Visual Studio Code into the ch32v307/EVT/EXAM/GPIO/GPIO_Toggle/User directory and added this directory to the workspace also. Then I created a launch.json file by clicking create a launch.json file(1), (2) and selecting the workplace (3) and GDB(4) items.

I replaced the contents of the created JSON file with the following.

{
	"tasks": {
		"version": "2.0.0",
		"tasks": [
			{
				"label": "run_openocd",
				"type": "process",
				"isBackground": true,
				"command": "${userHome}/csfs/openocd/openocd",
				"args": ["-f", "${userHome}/csfs/openocd/wch-riscv.cfg"],
				"problemMatcher": [
					{
					  "pattern": [
						{
						  "regexp": ".",
						  "file": 1,
						  "location": 2,
						  "message": 3
						}
					  ],
					  "background": {
						"activeOnStart": true,
						"beginsPattern": ".",
						"endsPattern": ".",
					  }
					}
				  ]
			}
		]
	},
	"folders": [
		{
			"path": "."
		}
	],
	"launch": {
		"version": "0.2.0",
		"configurations": [
			{
				"name": "gdb-openocd",
				"type": "gdb",
				"request": "attach",
				"executable": "gpio_toggle.elf",
				"remote": true,
				"target": ":3333",
				"cwd": "${workspaceRoot}",
				"gdbpath": "${userHome}/csfs/x-tools/riscv32-unknown-elf/bin/riscv32-unknown-elf-gdb",
				"preLaunchTask": "run_openocd",
				"autorun": [
					"set mem inaccessible-by-default off",
					"set architecture riscv:rv32",
					"set remotetimeout unlimited",
					"monitor reset halt",
					"load"
				]
			}
		]
	}
}

Before starting the debugging with Visual Studio Code, I mounted the disk image I made in a new Terminal window.

hdid -nomount csfs.sparseimage
mount -t hfs /dev/disk2s2 csfs
export PATH="$HOME/csfs/x-tools/riscv32-unknown-elf/bin:$HOME/csfs/openocd:$PATH"

Then I added the following line to the end of OpenOCD’s config file $HOME/csfs/openocd/wch-riscv.cfg to avoid the Restart and Disconnection issue I found when I tried to run Visual Studio Code on Ubuntu.

$_TARGETNAME.0 configure -event gdb-detach { shutdown }

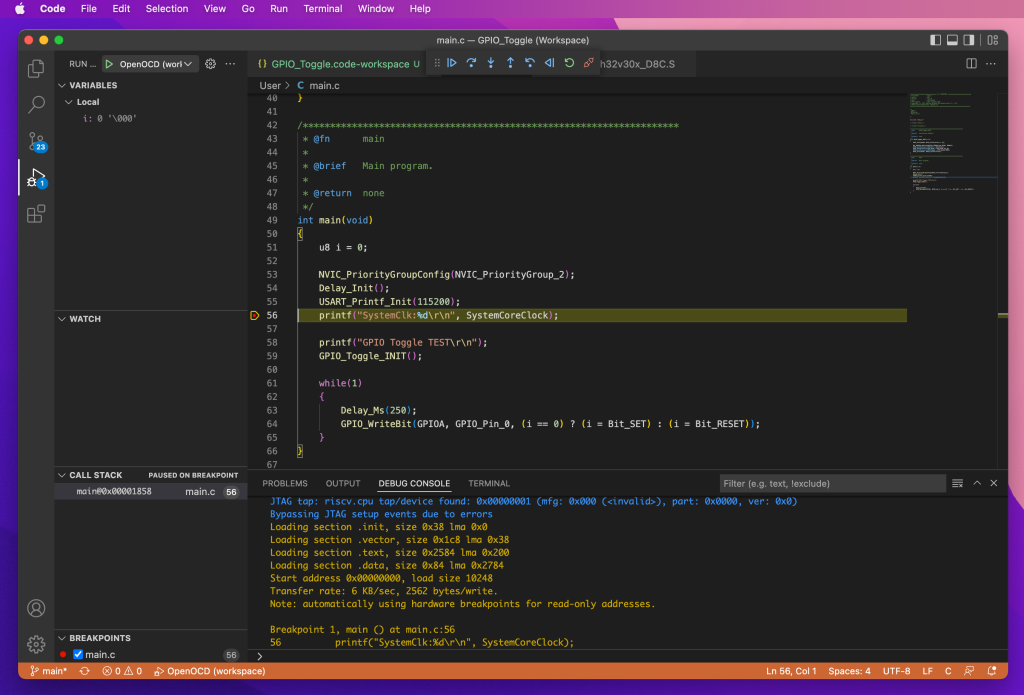
I set a breakpoint in main.c and started debugging by selecting the Start Debugging (F5) item under the Run menu.

As far as I tested briefly, debugging on Visual Studio Code worked pretty well. This time I was able to figure out a way to avoid the Restart (Ctrl+Shift F5) and Disconnect (Shift+F5) operation issues that I found when I tried Visual Studio Code on Ubuntu by modifying OpenOCD’s config file and defining preLaunchTask to the Visual Studio Code setting.

[Added on 2022-07-08]
I uploaded my ch32v307/EVT/EXAM/GPIO/GPIO_Toggle/ directory as the tgz file just for reference. My Visual Studio Code project file (GPIO_Toggle.code-workspace) with the above setting is also included in the tgz file.

Testing the toolchain for RISC-V on macOS

I tested the toolchain for RISC-V that I built on my Mac with WCH’s CH32V307RCT6 evaluation board (CH32V307V-EVT-R1). I used the GPIO toggle sample in the opencwch/ch32v307 repository on GitHub. At first, I mounted the disk image I made in the previous post.

hdid -nomount csfs.sparseimage
mount -t hfs /dev/disk2s2 csfs

This time I copied the openocd binaries that I also made before and the necessary file under a newly-created csfs/openocd directory. I added paths for the toolchain and the openocd binaries to the PATH environment variable.

export PATH="$HOME/csfs/x-tools/riscv32-unknown-elf/bin:$HOME/csfs/openocd:$PATH"

I cloned the opencwch/ch32v307 repository from GitHub

git clone https://github.com/openwch/ch32v307.git
cd ch32v307/EVT/EXAM/GPIO/GPIO_Toggle/User

I created a Makefile in the ch32v307/EVT/EXAM/GPIO/GPIO_Toggle/User directory. Then I built the GPIO_Toggle example and flashed a resulted hex file to the CH32V307RCT6 evaluation board.

make
openocd -f $HOME/csfs/openocd/wch-riscv.cfg -c init -c halt -c "program gpio_toggle.hex" -c exit

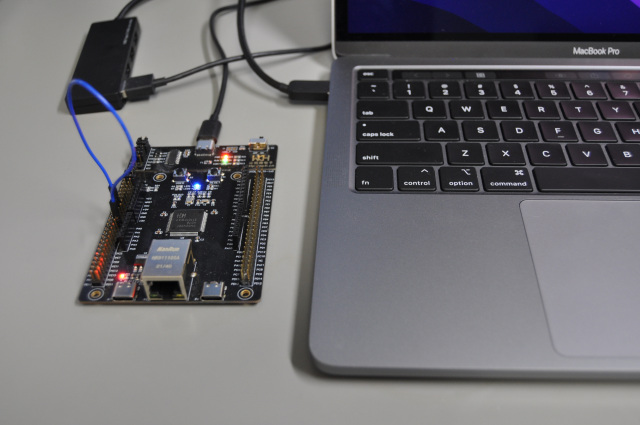
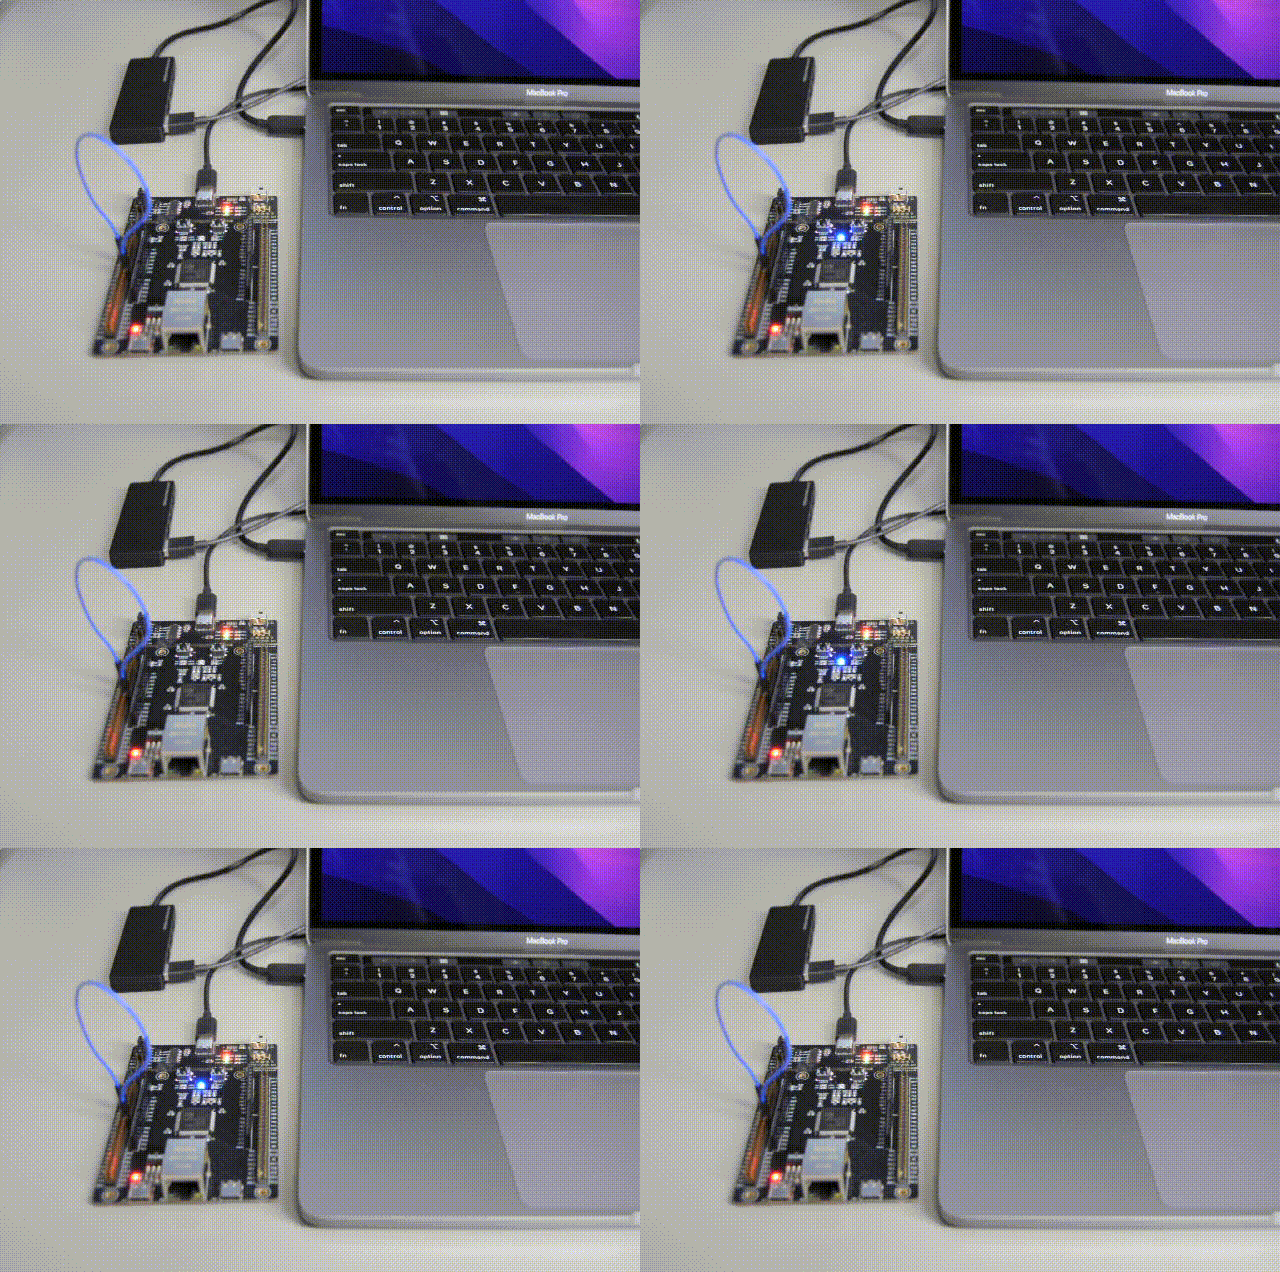
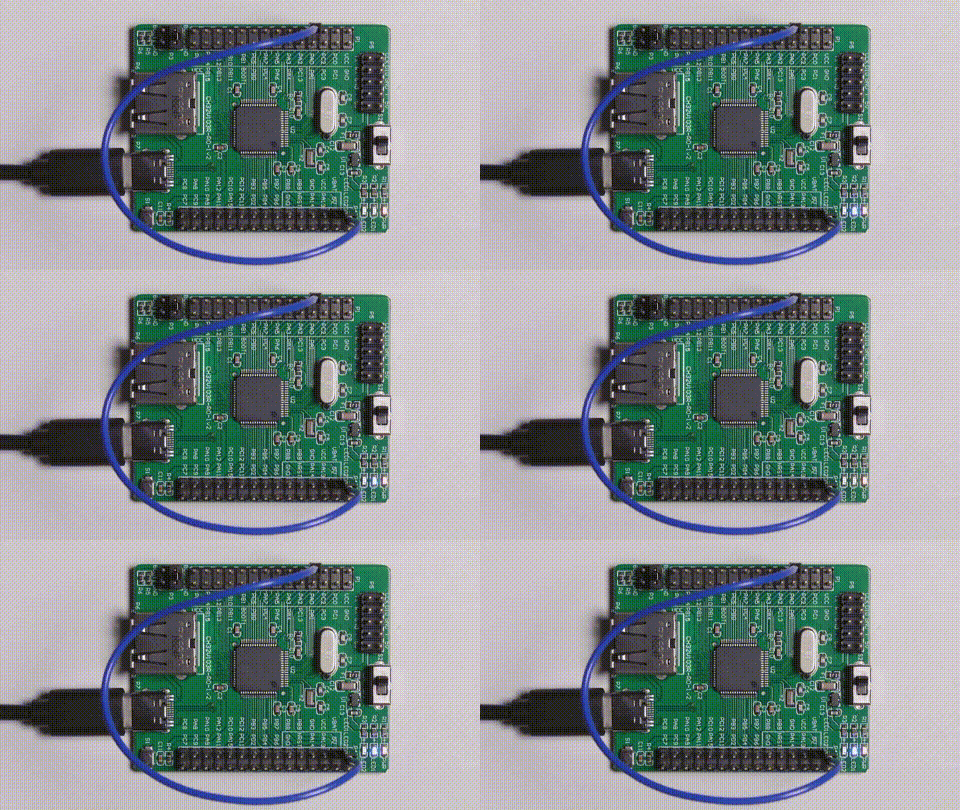
I connected the PA0 pin and the LED1 pin in the J3 header using a jumper wire to see toggling of the GPIO PA0 port as the blinking of the LED1. After flashing the hex file by the openocd, by pressing the reset button on the evaluation on board I saw the following LED blinking.

After testing the toolchain, I used the following command to unmount the disk image that I mounted under the csfs directory.

hdiutil detach /dev/disk2s2

Building Toolchain for RISC-V on macOS

As a part of investigating the CH32V series RISC-V MCU development environment on Mac, I tried to build the cross-toolchain for RISC-V by using Crosstool-NG on my Mac basically in the same way I did before on the Ubuntu 20.04. I used the same MacBook Pro  (intel, 13inch, 2020), and the OS version was macOS Monterey (Version 12.3.1).

To build the Crosstool-NG, I added additional Homebrew packages at first.

brew install bash texinfo libtool libmpc zlib gawk bison flex gperf patchutils help2man ncurses dtc expat gnu-sed binutils xz curl wget python@3.8

I built and installed the Crosstool-NG as follows.

export PATH="/usr/local/opt/python@3.8/bin:/usr/local/opt/binutils/bin:/usr/local/opt/ncurses/bin:$PATH"
export LDFLAGS="-L/usr/local/opt/python@3.8/lib -L/usr/local/opt/ncurses/lib"
export CPPFLAGS="-I/usr/local/opt/ncurses/include"
export PKG_CONFIG_PATH="/usr/local/opt/python@3.8/lib/pkgconfig"

git clone https://github.com/crosstool-ng/crosstool-ng
cd crosstool-ng
./bootstrap
./configure
make
sudo make install
sudo ct-ng update-samples

As seen in the above procedure, the setting of the environment variables for the ncurses was necessary for building the Crosstool-NG. And also, without specifying the environment variables for the python 3.8, which the Homebrew installed, I could build the Crosstool-NG itself. However, the Crosstool-NG without the above python settings failed to build the GCC 12.1.0 by a Python-related error.

Unfortunately, it also turned out that the Crosstool-NG requires a case-sensitive file system to build the toolchain (There is a description about this on the official site). To prepare the case-sensitive file system, this time, I created a disk image formatted with the case-sensitive file system using the hdiutil command and mounted the disk image under my home directory by the hdid command and the mount command as follows.

cd ~
hdiutil create -type SPARSE -fs 'Case-sensitive Journaled HFS+' -size 32g -volname csfs csfs

mkdir csfs
hdid -nomount csfs.sparseimage
mount -t hfs /dev/disk2s2 csfs

The device filename of the disk image (/dev/disk2s2) might have a different name under a different environment. The command hdid outputs the device filename of the specified disk image.

After mounting the created disk image under the ~/csfs directory, I built the cross-toolchain using the Crosstool-NG as follows.

cd csfs
mkdir build
mkdir src
cd build

ct-ng riscv32-unknown-elf
ct-ng menuconfig

For the ct-ng menuconfig command, I changed the following options from the default.

  • In the Path and misc options menu, I changed the Local tar balls directory setting from ${HOME}/src to ${HOME}/csfs/src and inserted /csfs between ${HOME} and /x-tools in the Prefix directory setting.
  • In the Target options menu, I enabled the Build a multilib toolchain.
  • In the C-library menu, I selected the newlib as the C library.
  • In the Companion libraries menu, I selected the newlib-nano and enabled the Additionally install newlib-nano libs into TARGET dir option for the newlib-nano.
  • In the Debug facilities menu, I enabled the gdb menu item and disabled the python scripting option inside the gdb menu item.

After saving the changes to the .config file, I initiated the toolchain build by the following command.

ct-ng build

The toolchain build took about 50mins with my Mac, and I finally got the working toolchain binaries under ~/csfs/x-tools/riscv32-unknown-elf.

OpenOCD for CH32V series on macOS

I have been using Ubuntu 20.04 to test the OpenOCD and the toolchain for the CH32V series RISC-V MCUs. It worked as expected for me, and I was also interested in whether I could do the same thing on my Mac.
To start investigating the development environment of the CH32V series MCUs on Mac, I tried to build the OpenOCD using the source codes from the same GitHub repository that I used before.

At first, I installed Homebrew according to the instruction on the top of the Homebrew page. I used MacBook Pro (intel, 13inch, 2020), and the OS version was macOS Monterey (Version 12.3.1).

/bin/bash -c "$(curl -fsSL https://raw.githubusercontent.com/Homebrew/install/HEAD/install.sh)"

After installing Homebrew, I added the following packages using the brew command.

brew install libtool automake pkg-config libusb hidapi

I cloned the OpenOCD repository in the same way as before.

git clone https://github.com/kprasadvnsi/riscv-openocd-wch/<br>cd riscv-openocd-wch

I applied one modification to the file src/jtag/drivers/wlink.c as follows.

sed -i '' -e '103s/^/void wlink_ramcodewrite(uint8_t *buffer, int size);\n/' src/jtag/drivers/wlink.c

This modification adds the function prototype of wlink_ramcodewrite() before the program calls the function for the first time in the wlink.c.
As I wrote in my old post, the compiler only outputted the warnings when I built the same source codes without the modification under the Ubuntu 20.04 environment. However, the compiler outputted errors without the above modification with the macOS environment. I could not figure out how to make the error into the warnings just by specifying additional compiler options. Thus I have decided to apply the patch directly to the source.
After applying the modification, I built the OpenOCD as follows.

./bootstrap<br>./configure CFLAGS="-Wno-error" --enable-wlink<br>make

I downloaded the same MRS_Toolchain_Linux_x64_V1.40.tar.xz from MounRiver’s download page as before and extracted the tar.xz file.

cd ~/Downloads<br>tar Jxvf MRS_Toolchain_Linux_x64_V1.40.tar.xz

I went back to the riscv-openocd-wch/src directory where I built the OpenOCD binary again. I copied the wch-riscv.cfg file to this directory from the extracted MRS_Toolchain_Linux_x64_V1.40 directory.

cp ~/Downloads/MRS_Toolchain_Linux_x64_V1.40/OpenOCD/bin/wch-riscv.cfg .

I tested my OpenOCD binary with WCH’s CH32V307RCT6 evaluation board (CH32V307V-EVT-R1). Erasing, programming and verifying operations were all worked.

Program

./openocd -f wch-riscv.cfg -c init -c halt -c "program CH32V307RCT6.hex" -c exit

Erase

./openocd -f wch-riscv.cfg -c init -c halt -c "flash erase_sector wch_riscv 0 last" -c exit

Verify

./openocd -f wch-riscv.cfg -c init -c halt -c "verify_image CH32V307RCT6.hex" -c exit

Reset

./openocd -f wch-riscv.cfg -c init -c halt -c wlink_reset_resume -c exit

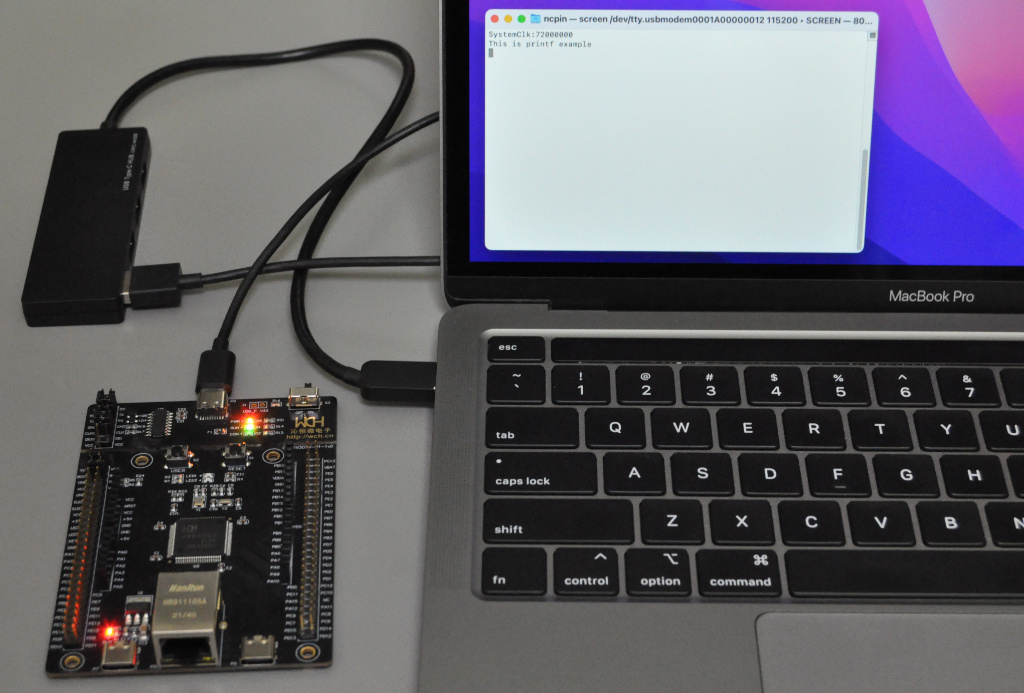
I checked with the same CH32V307RCT6.hex file as before. I used the screen command to see the UART output from the CH32V307.

screen /dev/tty.usbmodem0001A00000012 115200

Note
The device name /dev/tty.usbmodem0001A00000012 might vary depending on the environment. The actual device name should be able to be obtained by the ls command.

ls /dev/tty.usbmodem*

To quit from the screen command, you need to press control + a and k first. Then you will see the prompt Really kill this window [y/n] and press y to finish using the screen command.

Debugging with Visual Studio Code

As part of testing GDB in the previous post, I checked to see if I could also debug the CH32V103R Mini Evaluation board with Visual Studio Code.

After installing Visual Studio Code, I added the Native Debug extension by WebFreak. This extension is mandatory for the following process.

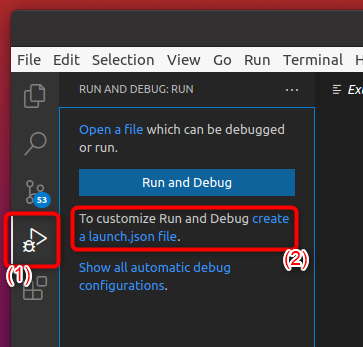
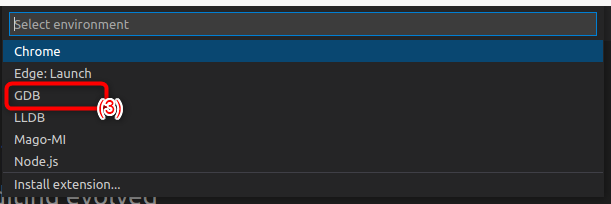
At first, I saved a workspace of Visual Studio Code into the ch32v103/EVT/EXAM/EXTI/EXTI0/User/ directory that I used in the previous post and added this directory to the workspace also. Then I created a launch.json file by clicking create a launch.json file(1), (2) and selecting the GDB(3) item.

I replaced the contents of the created JSON file with the following.

{
	"folders": [],
	"launch": {
		"version": "0.2.0",
		"configurations": [
			{
				"name": "OpenOCD",
				"type": "gdb",
				"request": "attach",
				"executable": "exiti0.elf",
				"remote": true,
				"target": ":3333",
				"cwd": "${workspaceRoot}",
				"gdbpath": "riscv32-unknown-elf-gdb",
				"autorun": [
					"set mem inaccessible-by-default off",
					"set architecture riscv:rv32",
					"set remotetimeout unlimited",
					"interrupt",
					"monitor reset halt",
					"load"
				]
			}
		]
	}
}

Before starting the debugging with Visual Studio Code, I ran the openocd in a different terminal.

sudo ./openocd -f wch-riscv.cfg

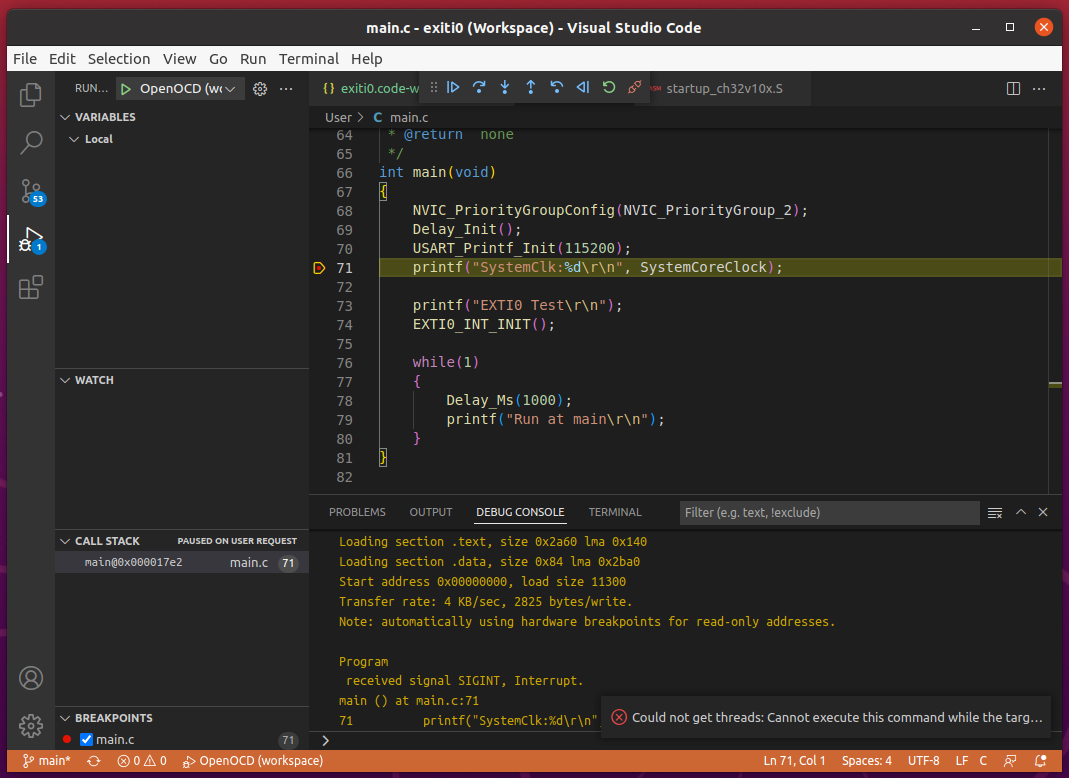
I set a breakpoint in main.c and started debugging by selecting the Start Debugging (F5) item under the Run menu.

One thing I noticed is that Restart (Ctrl+Shift F5) and Disconnect (Shift+F5) didn’t work properly. I saw that openocd outputted libusb-related errors after those two commands. I was able to start debugging again by restarting the openocd process and selecting Start Debugging (F5). Other than those two it looked that debugging on Visual Studio Code worked as expected.

[Added on 2022-06-24]
I wrote a new blog that addressed how to solve Restart (Ctrl+Shift F5) and Disconnect (Shift+F5) operation issue in the above. Please check my new post in addition to this entry.

Testing the toolchain – GDB

As a final step of testing the toolchain, I tried GDB with the CH32V103R Mini Evaluation board. Unfortunately, the binaries that I built in this post didn’t include a binary of the GDB command. Therefore, I rebuilt the toolchain with the following revised ct-ng menuconfig options.

  • In the Target options menu, I enabled the Build a multilib toolchain.
  • In the C-library menu, I selected the newlib as the C library.
  • In the Companion libraries menu, I selected the newlib-nano and enabled the Additionally install newlib-nano libs into TARGET dir option for the newlib-nano.
  • In the Debug facilities menu, I enabled the gdb. (*New)

After removing the previous ${HOME}/x-tools directory, I built the toolchain that includes the GDB command.

sudo apt install python3-distutils python3-dev<br>ct-ng build

Please note that I installed additional python related packages to build GDB with Crosstool-NG.

I tested the riscv32-unknown-elf-gdb using the same CH32V103 example as the previous post. To generate debug information I added -g and -O0 to the GCC options in the Makefile (Here is the updated file).
I ran the openocd separately in a different terminal first as follows.

sudo ./openocd -f wch-riscv.cfg

Then I ran riscv32-unknown-elf-gdb and executed the following commands in the GDB (I typed in the bolded part).

nc-pin$ riscv32-unknown-elf-gdb
GNU gdb (crosstool-NG 1.25.0_rc2.1_7e21141) 11.2
Copyright (C) 2022 Free Software Foundation, Inc.
License GPLv3+: GNU GPL version 3 or later <http://gnu.org/licenses/gpl.html>
This is free software: you are free to change and redistribute it.
There is NO WARRANTY, to the extent permitted by law.
Type "show copying" and "show warranty" for details.
This GDB was configured as "--host=x86_64-build_pc-linux-gnu --target=riscv32-unknown-elf".
Type "show configuration" for configuration details.
For bug reporting instructions, please see:
<https://www.gnu.org/software/gdb/bugs/>.
Find the GDB manual and other documentation resources online at:
    <http://www.gnu.org/software/gdb/documentation/>.

For help, type "help".
Type "apropos word" to search for commands related to "word".
(gdb) set mem inaccessible-by-default off
(gdb) set architecture riscv:rv32
The target architecture is set to "riscv:rv32".
(gdb) set remotetimeout unlimited
(gdb) file exiti0.elf
Reading symbols from exiti0.elf...
(gdb) target extended-remote :3333
Remote debugging using :3333
HardFault_Handler () at ch32v10x_it.c:40
40	    while(1)
(gdb) load exiti0.elf
Loading section .init, size 0x38 lma 0x0
Loading section .vector, size 0x108 lma 0x38
Loading section .text, size 0x2a60 lma 0x140
Loading section .data, size 0x84 lma 0x2ba0
Start address 0x00000000, load size 11300
Transfer rate: 4 KB/sec, 2825 bytes/write.
(gdb) 

Then I set a breakpoint at line 73 of the main.c and let the GDB continue to the breakpoint.

 (gdb) break main.c:73
Breakpoint 1 at 0x17f6: file main.c, line 73.
Note: automatically using hardware breakpoints for read-only addresses.
(gdb) cont
Continuing.

Breakpoint 1, main () at main.c:73
Python Exception <class 'UnicodeDecodeError'>: 'utf-8' codec can't decode byte 0xcd in position 449: invalid continuation byte
73	    printf("EXTI0 Test\r\n");
(gdb)

After inputting the cont command to the GDB, I saw the output of printf("SystemClk:%d\r\n", SystemCoreClock); at line 71 of the main.c on the UART connection from the CH32V103. I also tried several next commands.

(gdb) next
78	        Delay_Ms(1000);
(gdb) next
79	        printf("Run at main\r\n");
(gdb) next
78	        Delay_Ms(1000);
(gdb) next
79	        printf("Run at main\r\n");
(gdb) next
78	        Delay_Ms(1000);
(gdb)

This time I just tried the limited number of the GDB commands. However, it looked that the GDB I built was working as expected.

Testing the toolchain – Interrupt

When I was looking into the sample codes of ch32v103 on the git hub as written in my previous post, I noticed that the sample codes are using a non-standard function attribute __attribute__((interrupt("WCH-Interrupt-fast"))) for the interrupt routines. This unsupported attribute resulted in the following warning message during the build.

warning: argument to 'interrupt' attribute is not "user", "supervisor", or "machine" [-Wattributes]

To find out how to handle the interrupt routine with the toolchain that I built, this time, I picked up an interrupt example in the ch32v103/EVT/EXAM/EXTI/EXTI0 (GitHub).

git clone https://github.com/openwch/ch32v103.git<br>cd ch32v103/EVT/EXAM/EXTI/EXTI0/User

Then I created a Makefile in the ch32v103/EVT/EXAM/EXTI/EXTI0/User directory in the same way as before. Without modifying the ch32v10x_it.c (GitHub), the compiler gave me the warning message I mentioned and generated the following assembly code for EXTI0_IRQHandler() – one of the interrupt routines in the ch32v10x_it.c (Snipped from this exiti0.lst).

000018d8 <EXTI0_IRQHandler>:
  18d8: 1141               addi  sp,sp,-16
  18da: 4505               li  a0,1
  18dc: c606               sw  ra,12(sp)
  18de: 2c3d               jal 1b1c <EXTI_GetITStatus>
  18e0: c911               beqz  a0,18f4 <EXTI0_IRQHandler+0x1c>
  18e2: 6509               lui a0,0x2
  18e4: fe450513           addi  a0,a0,-28 # 1fe4 <__sf_fake_stdin+0xa4>
  18e8: 94ffe0ef           jal ra,236 <puts>
  18ec: 40b2               lw  ra,12(sp)
  18ee: 4505               li  a0,1
  18f0: 0141               addi  sp,sp,16
  18f2: a491               j 1b36 <EXTI_ClearITPendingBit>
  18f4: 40b2               lw  ra,12(sp)
  18f6: 0141               addi  sp,sp,16
  18f8: 8082               ret
  18fa: a001               j 18fa <EXTI0_IRQHandler+0x22>
  18fc: a001               j 18fc <EXTI0_IRQHandler+0x24>

This code will not work correctly since the compiler puts ret at the end of the interrupt function. The following is the output from the compiler that came with the MounRiver Studio for the same EXTI0_IRQHandler() with the non-standard function attribute __attribute__((interrupt("WCH-Interrupt-fast"))) (Snipped from this exiti0.lst).

000001ee <EXTI0_IRQHandler>:
   1ee: 4505               li  a0,1
   1f0: 2629               jal 4fa <EXTI_GetITStatus>
   1f2: c909               beqz  a0,204 <EXTI0_IRQHandler+0x16>
   1f4: 00002537           lui a0,0x2
   1f8: c0850513           addi  a0,a0,-1016 # 1c08 <_read+0xc>
   1fc: 105000ef           jal ra,b00 <puts>
   200: 4505               li  a0,1
   202: 2e19               jal 518 <EXTI_ClearITPendingBit>
   204: 30200073           mret

To get a similar result, I modified the function attribute for the three functions in the ch32v10x_it.c.

// [original]
void NMI_Handler(void) __attribute__((interrupt("WCH-Interrupt-fast")));
void HardFault_Handler(void) __attribute__((interrupt("WCH-Interrupt-fast")));
void EXTI0_IRQHandler(void) __attribute__((interrupt("WCH-Interrupt-fast")));

// [modified]
void NMI_Handler(void) __attribute__((interrupt("machine")));
void HardFault_Handler(void) __attribute__((interrupt("machine")));
void EXTI0_IRQHandler(void) __attribute__((interrupt("machine")));

I got the following output with this change (Snipped from this exiti0.lst).

000018da <EXTI0_IRQHandler>:
  18da: 7139               addi  sp,sp,-64
  18dc: d62a               sw  a0,44(sp)
  18de: 4505               li  a0,1
  18e0: de06               sw  ra,60(sp)
  18e2: dc16               sw  t0,56(sp)
  18e4: da1a               sw  t1,52(sp)
  18e6: d81e               sw  t2,48(sp)
  18e8: d42e               sw  a1,40(sp)
  18ea: d232               sw  a2,36(sp)
  18ec: d036               sw  a3,32(sp)
  18ee: ce3a               sw  a4,28(sp)
  18f0: cc3e               sw  a5,24(sp)
  18f2: ca42               sw  a6,20(sp)
  18f4: c846               sw  a7,16(sp)
  18f6: c672               sw  t3,12(sp)
  18f8: c476               sw  t4,8(sp)
  18fa: c27a               sw  t5,4(sp)
  18fc: c07e               sw  t6,0(sp)
  18fe: 2ca9               jal 1b58 <EXTI_GetITStatus>
  1900: c901               beqz  a0,1910 <EXTI0_IRQHandler+0x36>
  1902: 6509               lui a0,0x2
  1904: 02050513           addi  a0,a0,32 # 2020 <__sf_fake_stdin+0xa4>
  1908: 92ffe0ef           jal ra,236 <puts>
  190c: 4505               li  a0,1
  190e: 2495               jal 1b72 <EXTI_ClearITPendingBit>
  1910: 50f2               lw  ra,60(sp)
  1912: 52e2               lw  t0,56(sp)
  1914: 5352               lw  t1,52(sp)
  1916: 53c2               lw  t2,48(sp)
  1918: 5532               lw  a0,44(sp)
  191a: 55a2               lw  a1,40(sp)
  191c: 5612               lw  a2,36(sp)
  191e: 5682               lw  a3,32(sp)
  1920: 4772               lw  a4,28(sp)
  1922: 47e2               lw  a5,24(sp)
  1924: 4852               lw  a6,20(sp)
  1926: 48c2               lw  a7,16(sp)
  1928: 4e32               lw  t3,12(sp)
  192a: 4ea2               lw  t4,8(sp)
  192c: 4f12               lw  t5,4(sp)
  192e: 4f82               lw  t6,0(sp)
  1930: 6121               addi  sp,sp,64
  1932: 30200073           mret
  1936: a001               j 1936 <EXTI0_IRQHandler+0x5c>
  1938: a001               j 1938 <EXTI0_IRQHandler+0x5e>

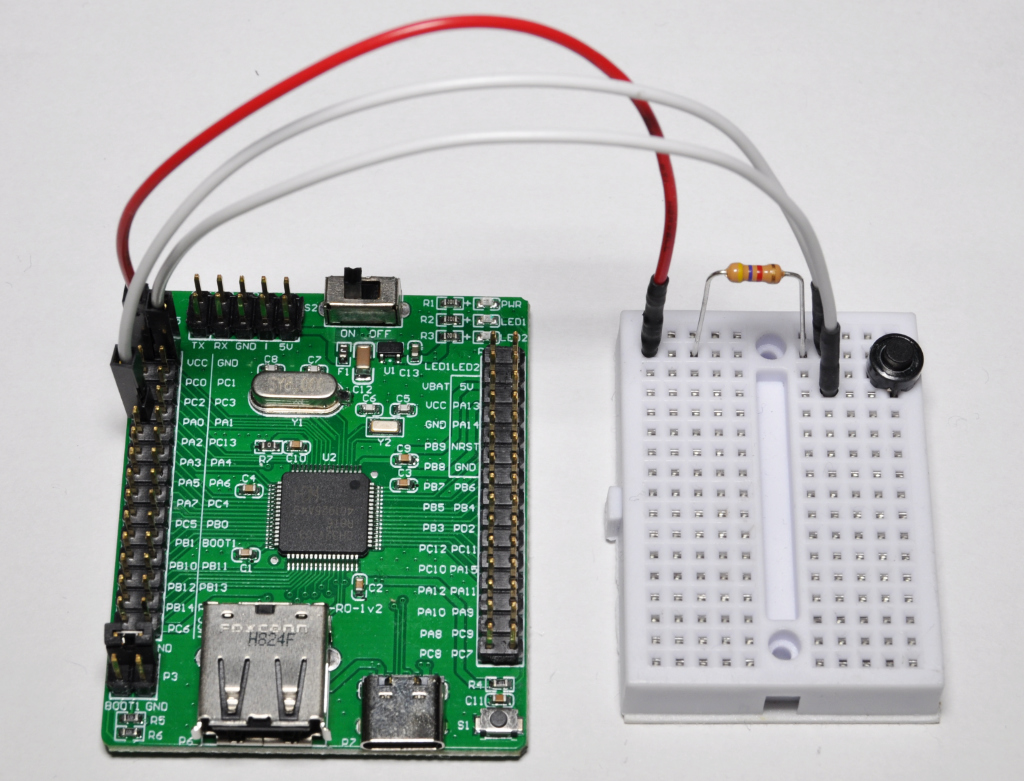
I tested the outputted hex file with the CH32V103R Mini Evaluation board. I wired up a push switch to the GPIO PA0 pin as follows.

While the loop in the main() function outputted Run at main periodically to the UART output, the interrupt routine EXTI0_IRQHandler() outputted Run at EXTI whenever I pressed and released the button that I added.

In this way, I was able to make the interrupt routine work by applying the standard function attribute __attribute__((interrupt("machine"))). It also increased the object size slightly compared with the object generated by MounRiver’s modified GCC (92bytes vs. 26bytes. @.text section).
I tried a combination of a function attribute __attribute__((naked())) that will not generate prologue/epilogue codes to a specified function and an inline assembly routine to remove the instructions for pushing and popping registers to the stack and confirmed that it worked also. We should use the naked attribute carefully, as written here, though.

[Added on 2022-05-07]
I noticed that WCH explained their interrupt mechanism in the below YouTube video (The explanation starts from around 11min). It appears that they call it the “HPE mode.”
The Research of RISC-V for Embedded MCUs. – YouTube

[Added on 2022-06-24]
The following page might be also very useful to understand the interrupt of the CH32V series.
FreeRTOS on CH32V307 (imi.moe)

Testing the toolchain – CH32V103R

I tested the toolchain for RISC-V that I built on the Ubuntu 20.04 with a CH32V103R Mini Evaluation board (CH32V103R8T6). I used one of the sample codes on the GitHub – openwch/ch32v103. I cloned the repository first.

git clone https://github.com/openwch/ch32v103.git<br>cd ch32v103/EVT/EXAM/GPIO/GPIO_Toggle/User

Then I created a Makefile as listed below in the ch32v103/EVT/EXAM/GPIO/GPIO_Toggle/User directory (GitHub).

# ----------------------------------------------------------------------
#  Macros for User App
# ----------------------------------------------------------------------
USER_DIR	= .
USER_OBJS	= main.o system_ch32v10x.o
USER_SOURCES	= $(USER_OBJS:.o=.c)
USER_DEPENDS	= $(USER_OBJS:.o=.d)
APP_NAME	= gpio_toggle
ELF_FILE_NAME	= $(APP_NAME).elf
DUMP_FILE_NAME	= $(APP_NAME).lst
HEX_FILE_NAME	= $(APP_NAME).hex
MAP_FILE_NAME	= $(APP_NAME).map

# ----------------------------------------------------------------------
#  Macros for WCH common library sources
# ----------------------------------------------------------------------
WCH_DIR			= ../../../SRC
WCH_CORE_INC_DIR	= $(WCH_DIR)/Core

WCH_START_INC_DIR	= $(WCH_DIR)/Startup
WCH_START_SRC_DIR	= $(WCH_DIR)/Startup
WCH_START_OBJS		= startup_ch32v10x.o
WCH_START_SOURCES	= $(WCH_START_OBJS:.o=.s)
WCH_START_DEPENDS	= $(WCH_START_SOURCES:.s=.d)

WCH_PERI_INC_DIR	= $(WCH_DIR)/Peripheral/inc
WCH_PERI_SRC_DIR	= $(WCH_DIR)/Peripheral/src
WCH_PERI_OBJS		= \
  ch32v10x_gpio.o ch32v10x_usart.o ch32v10x_rcc.o ch32v10x_misc.o
WCH_PERI_SOURCES	= $(WCH_PERI_OBJS:.o=.c)
WCH_PERI_DEPENDS	= $(WCH_PERI_SOURCES:.c=.d)

WCH_DEBUG_INC_DIR	= $(WCH_DIR)/Debug
WCH_DEBUG_SRC_DIR	= $(WCH_DIR)/Debug
WCH_DEBUG_OBJS		= debug.o
WCH_DEBUG_SOURCES	= $(WCH_DEBUG_OBJS:.o=.c)
WCH_DEBUG_DEPENDS	= $(WCH_DEBUG_SOURCES:.c=.d)

WCH_LD_SCRIPT		= $(WCH_DIR)/Ld/Link.ld

# ----------------------------------------------------------------------
#  Macros for Common part
# ----------------------------------------------------------------------
SOURCES	= $(USER_SOURCES) $(WCH_START_SOURCES) $(WCH_PERI_SOURCES) $(WCH_DEBUG_SOURCES)
DEPENDS	= $(USER_DEPENDS) $(WCH_START_DEPENDS) $(WCH_PERI_DEPENDS) $(WCH_DEBUG_DEPENDS)
OBJS	= $(USER_OBJS)    $(WCH_START_OBJS)    $(WCH_PERI_OBJS)    $(WCH_DEBUG_OBJS)
VPATH	= $(USER_DIR)     $(WCH_START_SRC_DIR) $(WCH_PERI_SRC_DIR) $(WCH_DEBUG_SRC_DIR)
TARGETS	= $(HEX_FILE_NAME)

# ----------------------------------------------------------------------
#  Build Options
# ----------------------------------------------------------------------
TOOL_PREFIX	= riscv32-unknown-elf
TOOL_PATH	= $(HOME)/x-tools/$(TOOL_PREFIX)
TOOL_LIB	= $(TOOL_PATH)/$(TOOL_PREFIX)
CC		= $(TOOL_PREFIX)-gcc
LD		= $(CC)
OBJCOPY		= $(TOOL_PREFIX)-objcopy
OBJDUMP		= $(TOOL_PREFIX)-objdump
INCLUDES	= \
  -I $(USER_DIR) -I $(WCH_CORE_INC_DIR) -I $(WCH_PERI_INC_DIR) -I $(WCH_DEBUG_INC_DIR)
COMMON_FLAGS	= \
  -mabi=ilp32 -msmall-data-limit=8 -mno-save-restore \
  -Os -fmessage-length=0 -fsigned-char -ffunction-sections -fdata-sections \
  -Wunused -Wuninitialized -MMD
SFLAGS		= -march=rv32imac_zicsr $(COMMON_FLAGS)
CFLAGS		= -march=rv32imac $(COMMON_FLAGS)
LDFLAGS 	= -march=rv32imac $(COMMON_FLAGS) -T $(WCH_LD_SCRIPT) \
  -nostartfiles -Xlinker --gc-sections -Wl,-Map,$(MAP_FILE_NAME) \
  -specs=nano.specs -specs=nosys.specs

# ----------------------------------------------------------------------
#  Default Rules
# ----------------------------------------------------------------------
.s.o:
	$(CC) $(SFLAGS) $(INCLUDES) -o $@ -c $<

.c.o:
	$(CC) $(CFLAGS) $(INCLUDES) -o $@ -c $<

.c.d:
	$(CC) $(CFLAGS) $(INCLUDES) -o $@ -c $<

# ----------------------------------------------------------------------
#  Build Rules
# ----------------------------------------------------------------------
all: $(TARGETS)

$(DEPENDS) : $(SOURCES)

$(TARGETS) : $(OBJS)
	$(CC) $(LDFLAGS) -o $(ELF_FILE_NAME) $(OBJS)
	$(OBJCOPY) -O ihex $(ELF_FILE_NAME) $@
	$(OBJDUMP) --all-headers --demangle --disassemble $(ELF_FILE_NAME) > $(DUMP_FILE_NAME)

.PHONY : clean depend
clean:
	$(RM) $(TARGETS) $(OBJS) $(DEPENDS) $(ELF_FILE_NAME) $(DUMP_FILE_NAME) $(MAP_FILE_NAME) $(WCH_START_SOURCES)

-include $(DEPENDS)

I also copied the openocd and wch-riscv.cfg files I built before into this directory. I made and flashed a hex file of the GPIO_Toggle sample program by running make and openocd.

export PATH=$PATH:$HOME/x-tools/riscv32-unknown-elf/bin
make
sudo ./openocd -f wch-riscv.cfg -c init -c halt -c "program gpio_toggle.hex" -c exit

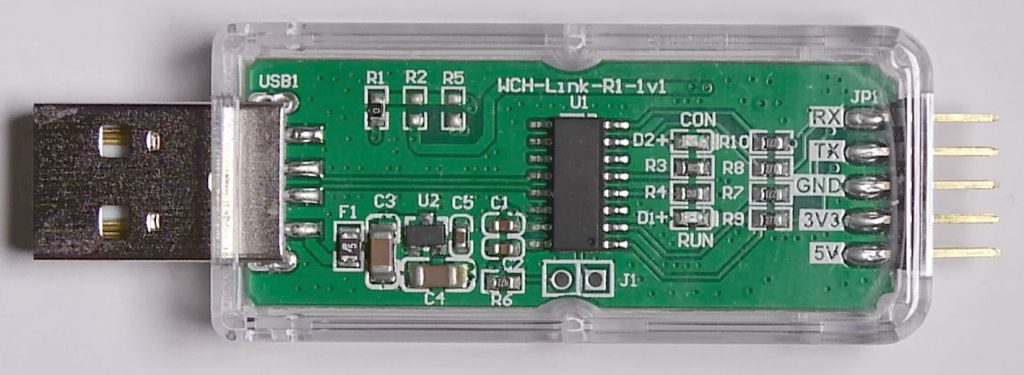
I used a WCH-Link to flash the CH32V103R Mini Evaluation board this time.

I connected between the P1 header PA0 pin and theP4 header LED1 pin by a jump wire to see the toggling of the GPIO PA0 pin as the blinking of the LED1 (The small blue LED at the bottom right corner).

Toolchain for RISC-V (CH32V series)

As a next step for building OpenOCD, I tried to set up the cross-toolchain for RISC-V on the Ubuntu 20.04.
I used Crosstool-NG to do this. Initially, I tried Crosstool-NG Release 1.24.0, but this version doesn’t have an option to build the Newlib-nano library as a companion library. So I cloned the latest source code from a GitHub repository directly (The git commit SHA-1 hash was 7e21141).
The following is the record of my trial on Ubuntu 20.04.

sudo apt install git make texinfo libtool libtool-bin libmpc-dev zlib1g-dev gawk build-essential bison flex gperf patchutils help2man libncurses-dev curl device-tree-compiler libexpat-dev libusb-1.0-0-dev
git clone https://github.com/crosstool-ng/crosstool-ng
cd crosstool-ng
./bootstrap
./configure
make
sudo make install
sudo ct-ng update-samples

Then I built the cross-toolchain using the Crosstool-NG as follows.

mkdir build<br>cd build<br>ct-ng riscv32-unknown-elf<br>ct-ng menuconfig

For the ct-ng menuconfig command, I changed the following options from the default.

  • In the Target options menu, I enabled the Build a multilib toolchain.
  • In the C-library menu, I selected the newlib as the C library.
  • In the Companion libraries menu, I selected the newlib-nano and enabled the Additionally install newlib-nano libs into TARGET dir option for the newlib-nano.

After saving the changes to the .config file, I initiated the toolchain build by the following command.

ct-ng build

The toolchain build took about 30mins with my machine, and I finally got the toolchain binaries under ~/x-tools/riscv32-unknown-elf.